My mini air purifier kept on turning on inside my bag, so I made this a learning project to make a case for a rounded gadget. I dipped into the scraps of a previous project and I finished it in two nights.
Here's how I made it:
I didn't really measure it. I just based the size of the case on the gadget. I just made sure that the gadget would fit the case :)
I've been working on sorting and restoring my Mom's fabric and retaso (scrap fabric) stash. I've been toiling over it for the past few months and decided to take a break by sewing. I restored a cute, embroidered fabric. It still had some stains, so I thought it best to make kitchen curtains.
Since the fabric was a bit short, I decided to "upgrade" my curtain sewing skills, by adding a different kind of fabric to make it longer. I matched it with some soft denim fabric and added lace. I wanted to try make table top curtains (the one with loops), but I'm still doing a lot of other stuff, so went for my usual rod pocket curtains.
Here's how I made it:
The result:
Measurements based on my kitchen window:
I just also realized the new curtains match my cat kitchen appliance covers!
I definitely made a lot of hearts! I decided to make a heart themed tote bag for a friend during pride month. He loved it and has been using the tote bag to carry around gadgets.
Having ready-made hearts makes it easy to create other projects. For this tote bag project, I just added fabric to the top and bottom. Ironed it on interfacing and sandwiched it with batting. After stitching in the ditch, I added the straps and the lining. Easy peasy :)
I love making heart themed quilts. I had an idea to make a smaller one to make several projects, so I thought I'd make multiple hearts to save me time from cutting fabric. I was inspired to make this from Pinterest. I saw it a couple of years ago and worked on figuring out the measurements. That's one thing I enjoy about quilting... the math! And that's why I usually work things out on a math notebook so I know how best to cut fabric.
I decided to start the year by making something useful and cute. I also wanted the satisfaction of finishing a project in a few days, so I made a tote bag. It was inspired from a jute bag given to me. It's the perfect size to carry stuff at home (I don't like putting stuff in my pocket). I'm now using the one I just made to house my portable air purifier and fan which I bring whenever we go out. I love it.
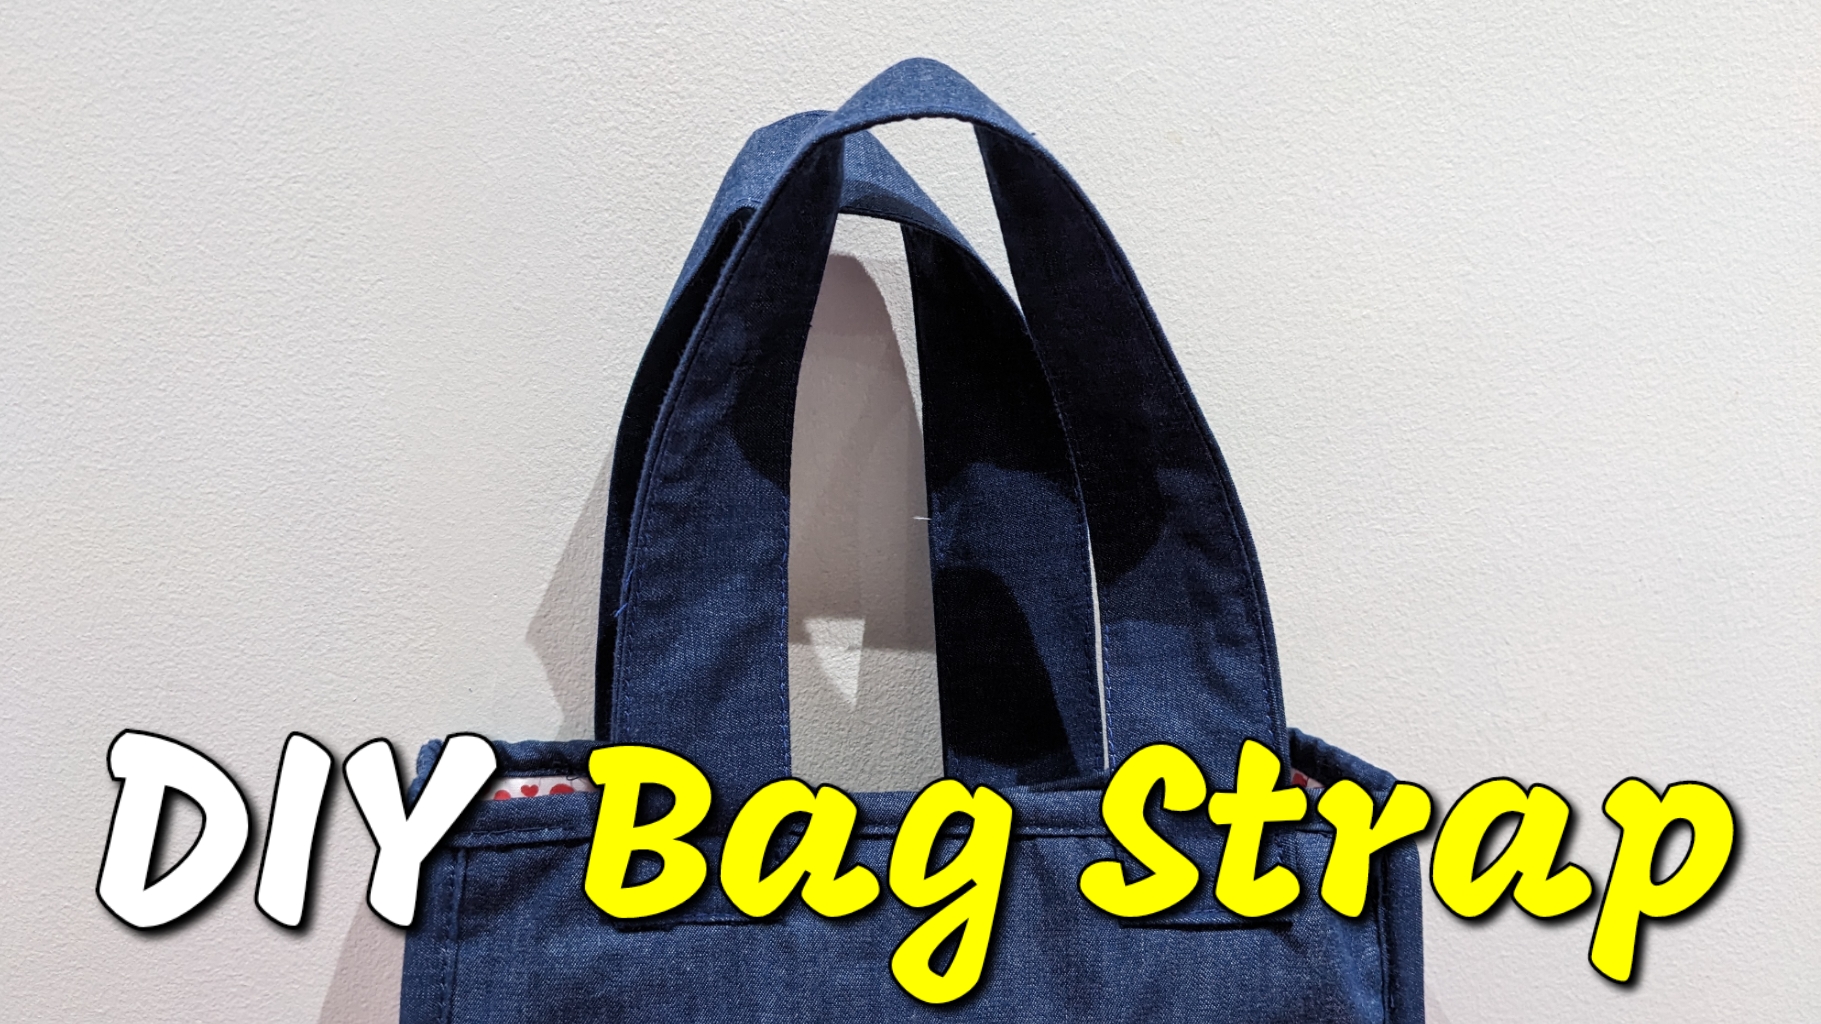
For this project I wanted to start strong so I chose to use the Wonder Woman fabric I got from Spotlight. I matched it with pseudo demin fabric to bring out the colors. Figuring out the size of the pieces and piecing them together was easy. I couldn't find my stash of bag straps, so I ended up learning how to make bag straps for this project. You can also watch the video here.
Here's how I made the tote bag:
Materials:
fabric with design
solid color fabric (I used pseudo jeans)
fusible interfacing
wadding
backing fabric
thread
If making the strap:
solid color fabric
1.5" fusible interfacing (the thicker one for straps)
thread
Size: 8.5" x 4" x 9.5" (bag); 16" x 1.5" (strap)
Steps:
1. Measure and cut pieces of fabric.
2. Piece together fabric of main bag (top + middle + bottom + base).
3. Iron the main bag and then add on fusible interfacing. Do the same for the sides of the bag.
4. Sandwich with wadding and backing fabric.
5. Stitch in the ditch the main bag. I used parallel lines for the sides.
6. Assemble the main bag and the sides.
7. Bind the exposed parts. Start with the sides of the bag and then the top.
I wanted to start the year with a fun project. I decided to make a bag inspired by a jute bag a friend gave me. I love the shape and size of the bag. I use one daily at home to carry stuff from room to room. While making the bag, I discovered I couldn't find the straps I've collected over the years! I didn't want to waste time looking for the straps, so I decided to just DIY it.
Here's the tutorial:
Luckily, I had all the materials on hand. Here's what you need:
I felt I needed to add a small item with the laptop sleeve I made for my friend. I really want to learn how to install a zipper on my projects, so I thought a small pouch would be nice. She could use it as a pencil case or other knick-knacks. It would fit the pocket of the sleeve too.
I decided to match it with the laptop sleeve, so I didn't change the design anymore. I had the fabric on my sewing basket, so I finished everything in one evening. It was a small piece, but nonetheless challenging when it came to adding the lining. I had to re-watch my quilted tote bag video to figure it out. I did it wrong the first time, so ended up doing it again, haha. Just remember to slip in the right side of the pouch with the lining facing the wrong side out (note for myself!).
Here's the tutorial:
The steps:
1. Plan, design and cut the fabric.
2. Piece together. Start with the middle part, then add the outer sides.
3. Iron both sides.
4. Sandwich with wadding and backing fabric.
5. Pin to stabilize and stitch in the ditch.
6. Clean the sides.
7. Add the zipper.
8. Sew the edges together from the wrong side.
9. Add the lining. Pull out the pouch from the open side of the lining.
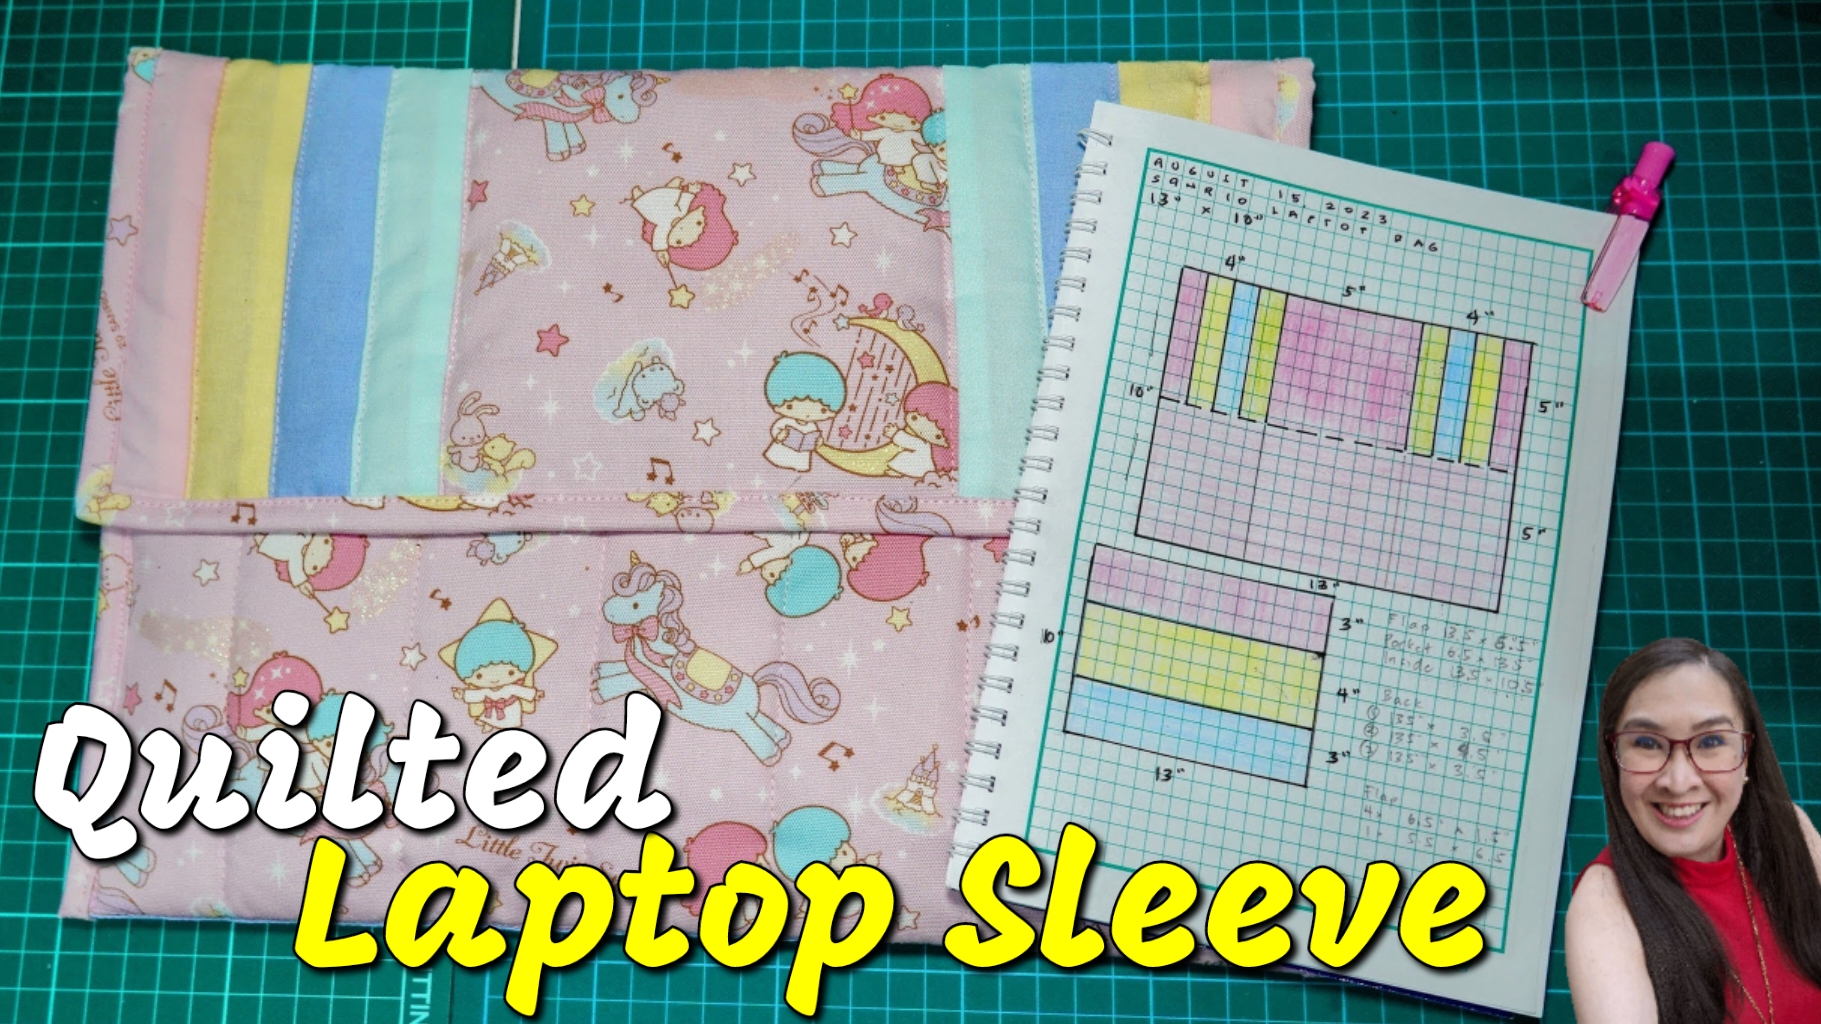
I have a friend who loves Little Twin Stars. I knew about this Sanrio character because my sister had it on her dresser (jewelry boxes). I'm glad I found Little Twin Stars fabric online. I only got a meter because it's expensive! There's probably a lot more options available in Japan.
After storing the fabric for a few months, I finally decided to make a laptop sleeve for my friend. I asked her what kind of laptop she was using. Then I worked out the measurements and design. I asked help from my son to help me choose the colors of the fabric. I wanted to make sure the colors would complement the Little Twin Stars fabric.
I made the design simple, to make sure the Little Twin Stars fabric is noticeable. The challenging part in assembling this quilted laptop sleeve is figuring out how to properly add the pocket. I wanted the wadding to be continuous to add strength to the sleeve.
I'm glad I didn't rush to finish the project because I was able to make the sleeve stable. I was also able to add velcro discreetly. I didn't want stitches for the velcro to show on the flap. I'm happy how it turned out, I just hope my friend's laptop fits!
Here's the tutorial:
The steps:
1. Plan and design.
2. Create the inner panel and pocket. Sandwich the pocket with wadding and bind the top. Join the inner panel and pocket at the bottom.
3. Piece together the flap.
4. Piece together the back panel.
5. Join the back panel and flap. Then join the inner panel with pocket.
6. Sandwich with wadding. Stabilize with pins and then quilt. Don't quilt the flap yet.
I worked on the front cover first of this project. I was inspired by a pinterest pin to create two cute cats. See previous posts on how I created the base and put on the cat face. I took my time to finish it since I had to figure out how to create it from scratch.
The trick to making quilt covers for your appliances/gadgets is to create it in panels. That way it's easier to bind them together. Binding the panels just took one afternoon. It helps to prepare your bias tape ahead of time.
Here's a short tutorial -
Steps
1. Finish the front panel.
2. Create the back panel with pocket.
3. Make the main panel that will combine the front and back panel.
4. Clip and sew the front panel. Do the same for the back panel.
5. Clip wrong side of binding. Sew.
6. Finish the binding.
See also part 1 and part two of this project:
Part 1: https://www.needleadventures.com/2023/05/another-pinterest-inspired-cat-quilt.html
Part 2: https://www.needleadventures.com/2023/06/making-cat-face-and-quilt-cover-pocket.html
It was quite a challenge to add the face of the cat on my Pinterest inspired cat quilt. I want to use the design for a kitchen appliance cover. The design though is more intricate than other cat quilts. For other cat quilts you just need a button for the eyes. The design for this quilt requires eyes with a background, plus eyelashes.
Decided to make it easy for me and used felt fabric and a button for the eyes. Also just added a tiny embroidered eyelash. For the nose and mouth, I just embroidered a small nose and mouth. I skipped the whiskers since that's the interesting feature of my KitchenAid cat quilt cover.
One thing I had fun with was the placement of the button for the eyes. I moved it around to find which ones were cute. It was hard to select, so I just made it all different. It turned out well. After completing the face I realized the cat is stouter than the Pinterest inspiration. Our feral kitties do have wider faces, so I guess I took inspiration from that, hehe.
Here's a tutorial
Steps on Adding the Cat Face
1. Find an appropriately sized coin. Use this to measure the outer eye on felt fabric.
2. Embroider the outer eye on the face using blanket stitch.
I wanted to explore more cat designs on Pinterest. I knew it would help me hone my skills more on making templates and figuring out how to re-create a design I see online or on a book. Pinterest is a treasure trove of ideas and inspiration for quilting. I have pinned many ideas which I hope to try making. Follow me on Pinterest if you have one: https://www.pinterest.com/aileenapolo/.
Here's the tutorial -
Here are the steps on how I made this cute cat quilt -
1. Drew the design on graphing paper based on the size for my end project.
2. Rendered the design on manila paper to get an idea of the size. I adjusted a couple of times.
3. Draw the design on a chip board. Cut based on how you will piece together the design.
4. Cut the fabric. Make sure to add 1/4" around the template.
5. Piece together. Best to start with the ear area and complete the face and chin.
I turned the Pinterest-inspired cat quilt into a KitchenAid cover. It now sits proudly on our kitchen counter. I've been making rainbow colored quilts using standard shapes. I made the cat quilt to gain more skills and to have fun.
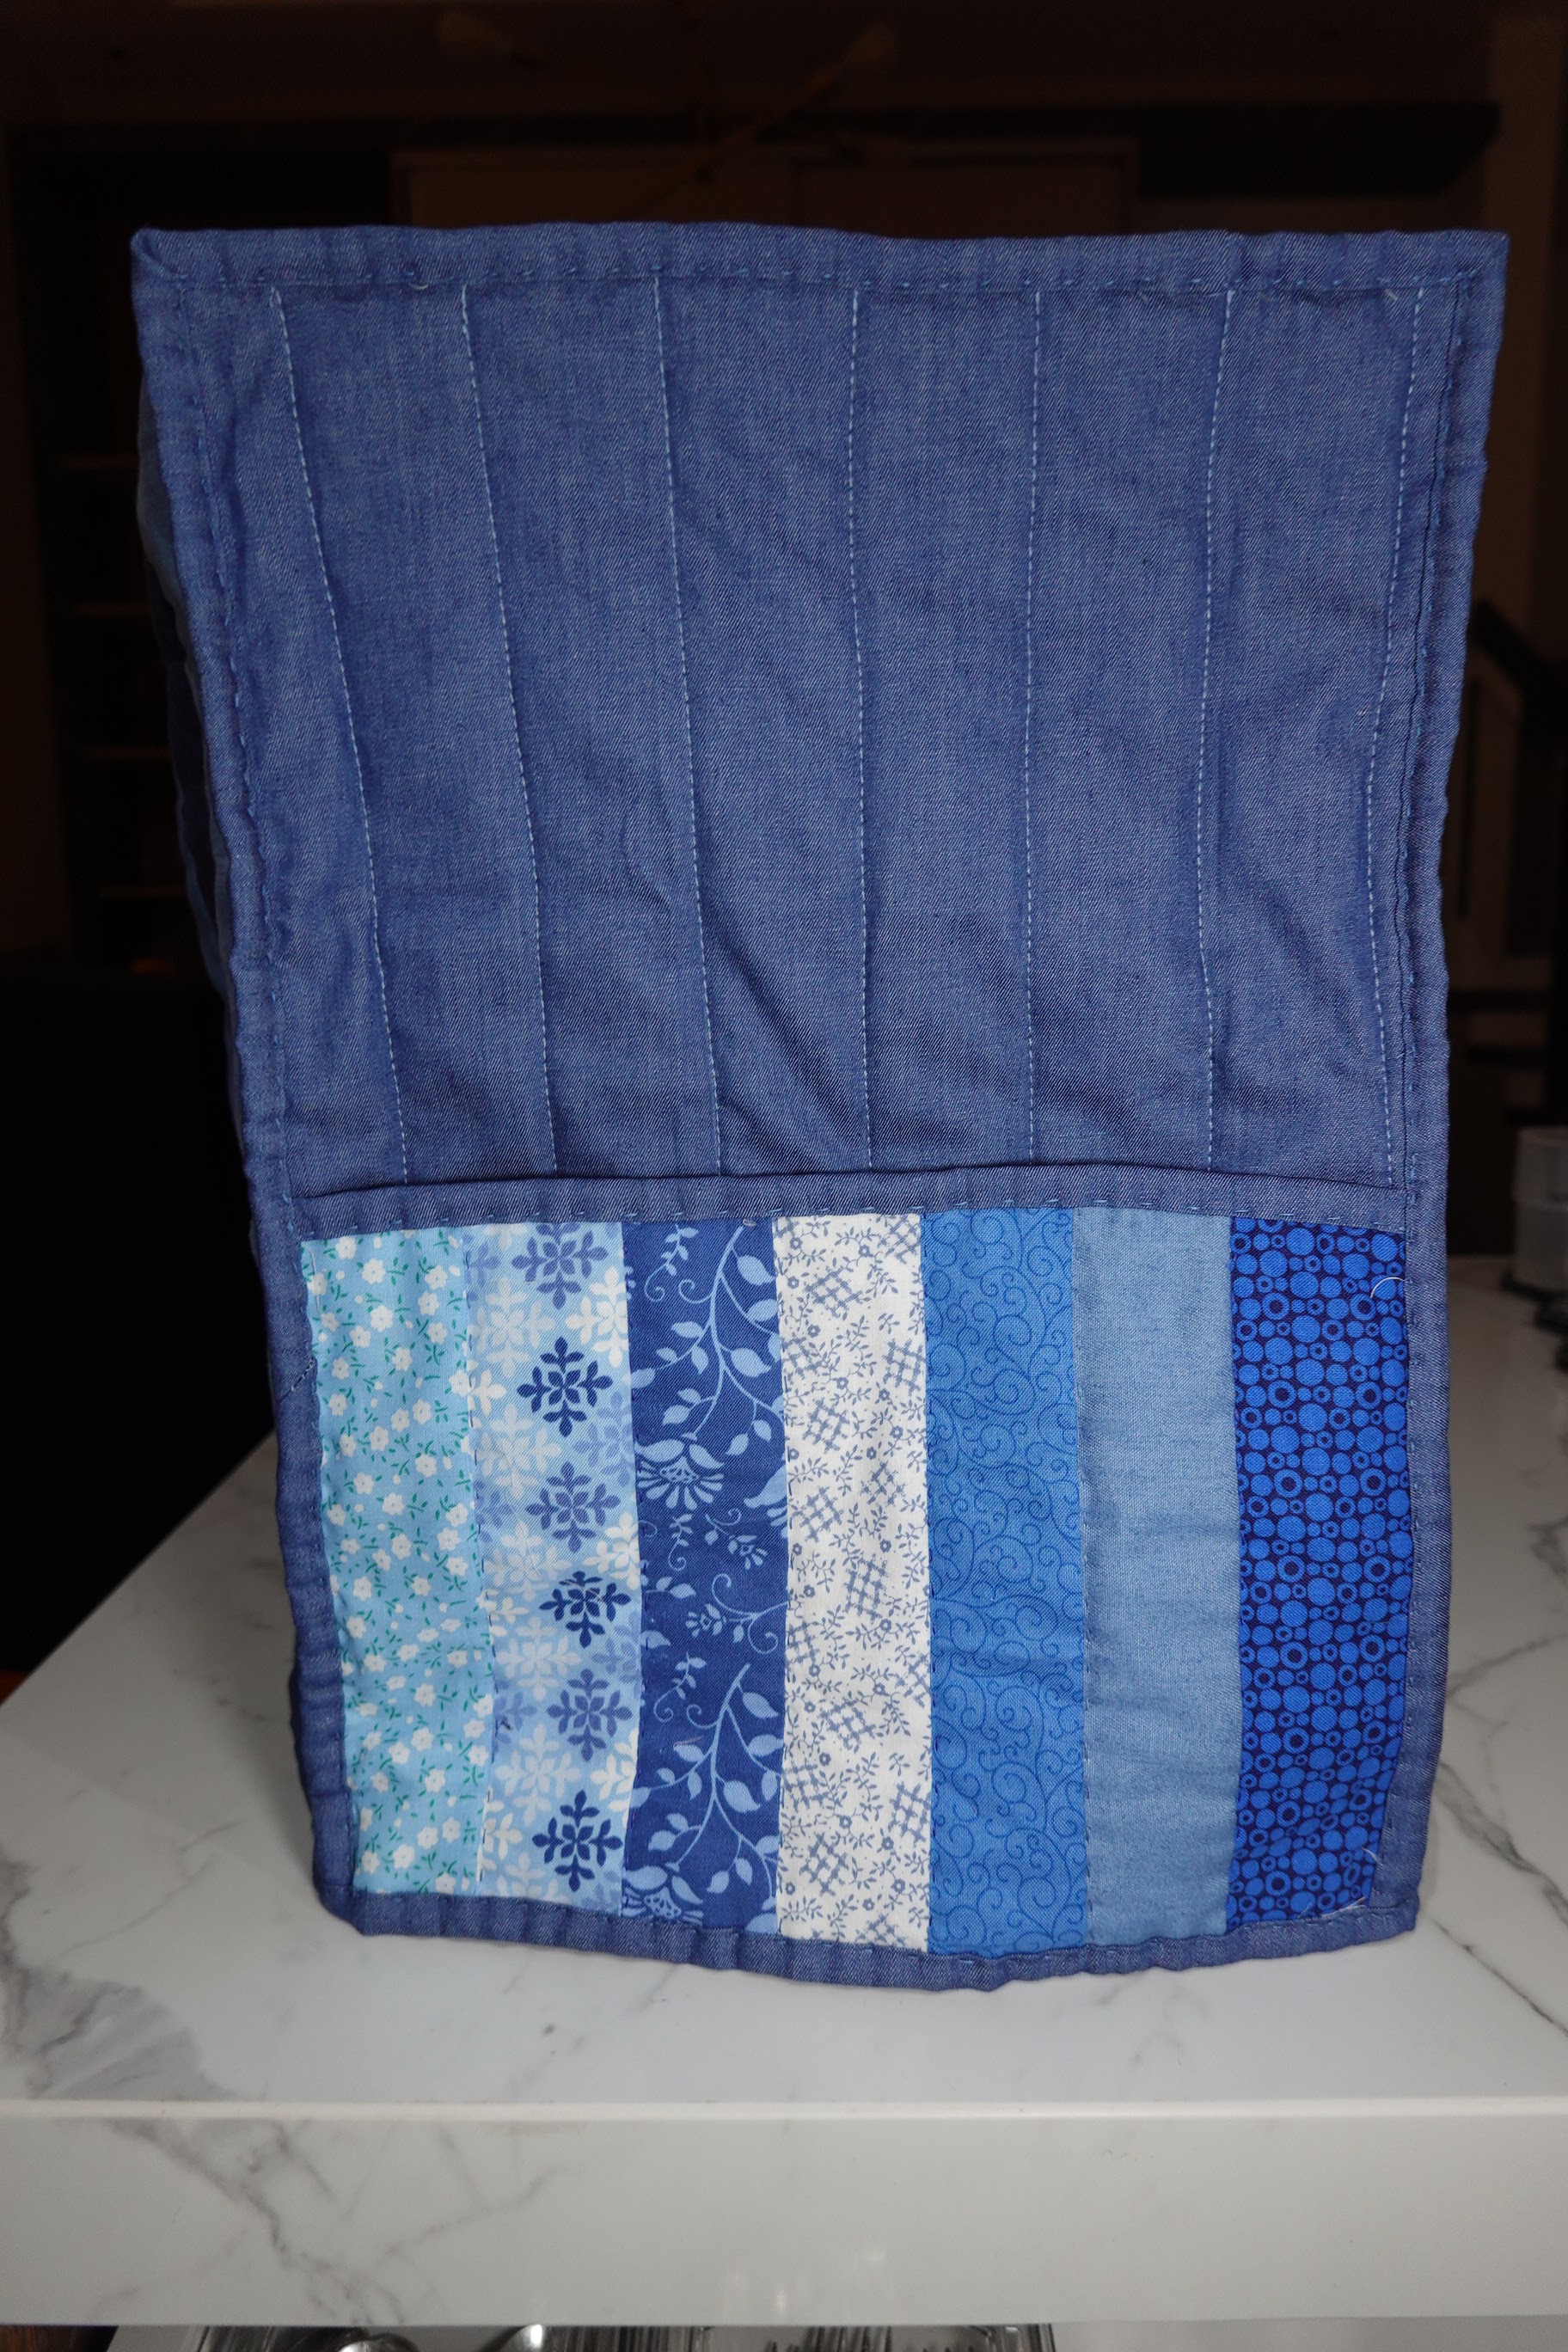
I made the KitchenAid cover by part. I started with the front cover, then the main cover and the back cover. I thought it would be easier just to make the main cover like a tent. I just used strips of denim-like fabric since I wanted to stick to one color. I used the same fabric for the back cover pocket. I made it that way so I could switch the front and back whenever I felt like it. For now, the cats are watching over my kitchen.
Here's a tutorial -
Here are the steps how I made the cover -
1. Create the front cover (follow the process here).
2. Make the main cover
Cut 7 strips of 3" x 39"
Sew the strips together
Iron both sides
Sandwich with wadding and back fabric (I used an old bed protector)
Pin and quilt
Clean up the sides
3. Make the back cover with pocket
Cut the base, same size as your front cover 10.5" x 14.5"
I love using essential oils and through the years I've been using a case a friend gave me. I set it aside a few weeks ago since I wanted to measure it to make a new one. Finally decided to make a new one for an upcoming trip and my trusty EO case went missing! I just then made my own measurements so I could proceed with the project.
Found some leftover pieced fabric from my KitchenAid quilt cover project and decided to use it. I originally wanted to use a cute design, but decided to use strips since I'm just learning to do this. You can also use a jelly roll to make this.
Measurements:
Finished size: 10.5" x 4"
Unfolded size: 10.5" x 6.5"
Materials:
5 strips, cut each at 1/2 meter x 2.5"
wadding
backing fabric
binding
8" garter
How to Video:
I love how it turned out. I made a few more for friends who use EOs :)
Summer rolled in so fast! Needed to make new curtains for our kitchen window. I shied away from having our curtains custom made because it's so expensive! Found out I could make my own for a small fraction of the cost. Making my own curtains also allows me to experiment on the fabric.
Found some Swissdot fabric on Lazada. I thought it was cute. The shop had 26 different colors. Settled for "oatmeal" since it would go with anything. Here's how I made the kitchen curtains. It only took me two nights to finish it.
Before I left Singapore, I made a mad dash to make some lap quilts for my friends. I knew one was a Harry Potter fan, so I thought I'd make one for him. I used solid fabric colors to complement the design. I just used simple shapes to make it easier for me to finish the quilt. Managed to finish it a few days before we went home.
My friend said, Lily his pet dog, immediately commandeered the blanket as soon as she saw it. She looked so cute on it, that's why I asked permission if I could use her photos for this post. I'm glad they liked it, yay!
My doctor required me to have my own oxygen concentrator. I didn't expect it to be so big! I don't use it often, so thought it would be good to keep it covered. I took it as an opportunity to make a new quilt project.
I was raring to finish my t-shirt memory quilt at that time, so wanted to quickly finish the cover for my huge appliance. I used my favorite rainbow colored fabric and just cut it in squares for easy piecing. My measurement for the size was wrong, so I just added a black strip to make the cover a bit bigger.
Like the food processor cover I made, I decided to add pockets. In case of emergency it would be useful to have the components of the O2 concentrator accessible. It took me less than two weeks working on this project off and on. My favorite part was quilting. The difficult part was getting the measurements right and binding the whole project together. It got quite heavy.