
I turned the Pinterest-inspired cat quilt into a KitchenAid cover. It now sits proudly on our kitchen counter. I've been making rainbow colored quilts using standard shapes. I made the cat quilt to gain more skills and to have fun.

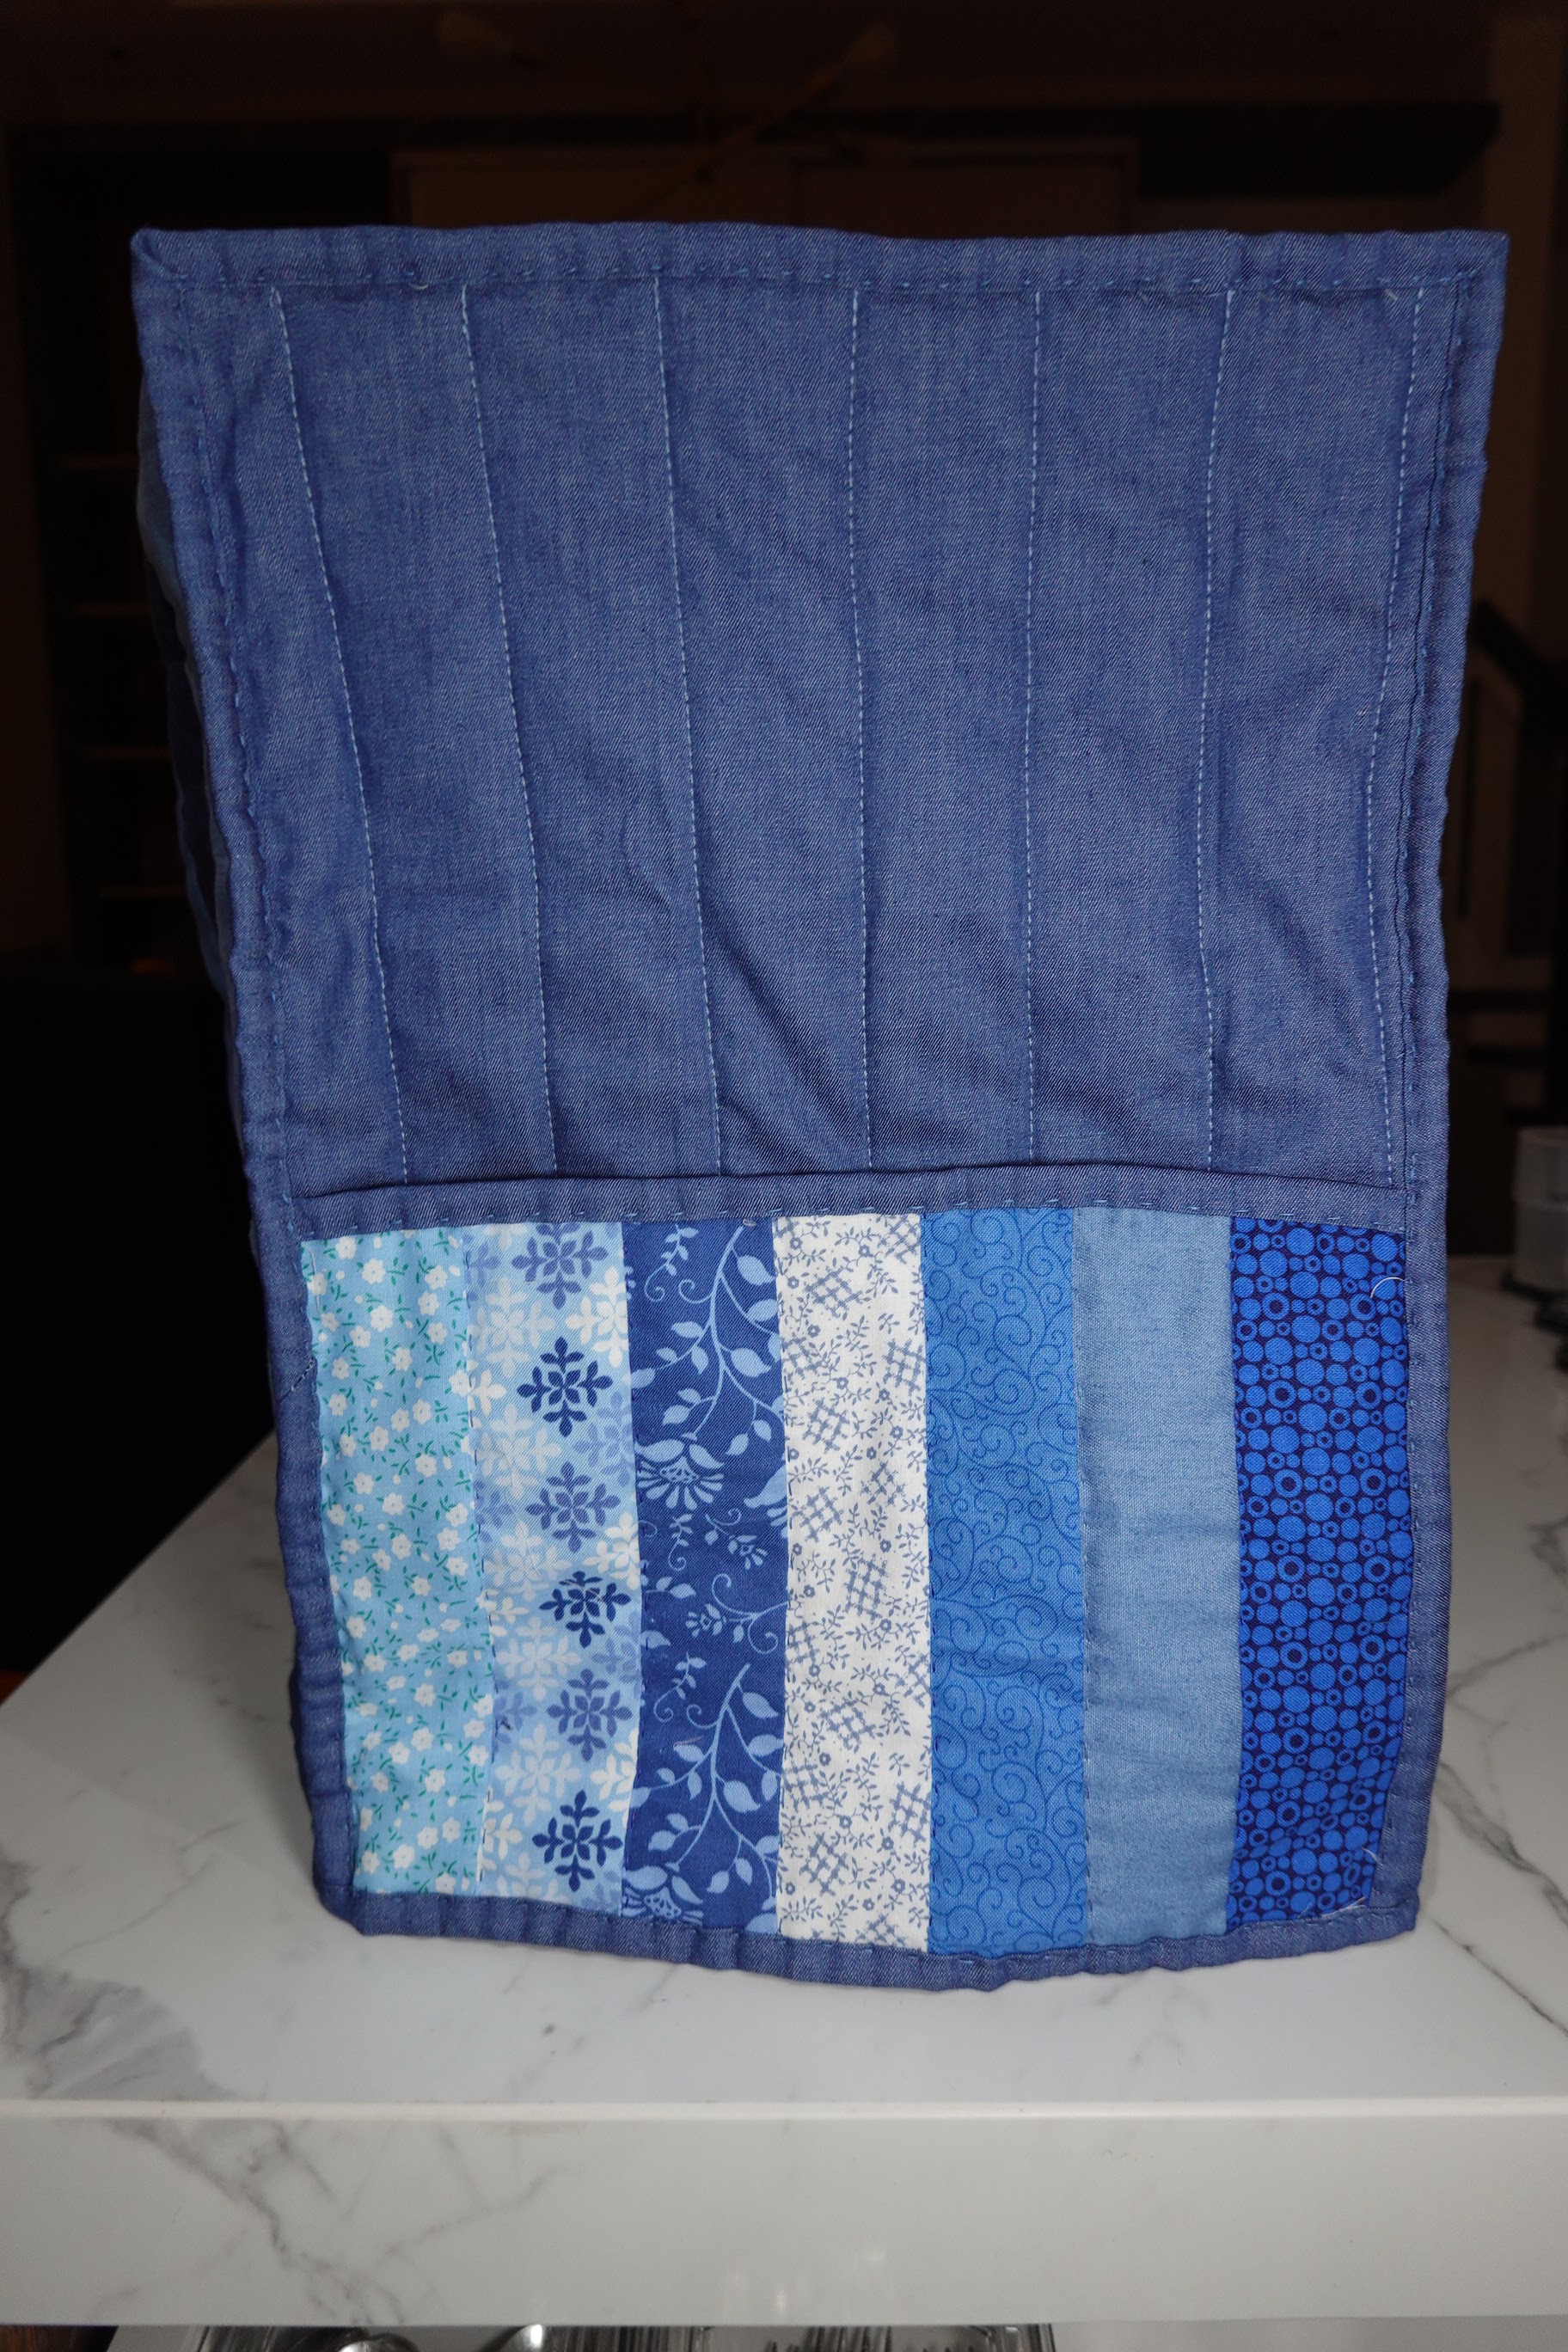
I made the KitchenAid cover by part. I started with the front cover, then the main cover and the back cover. I thought it would be easier just to make the main cover like a tent. I just used strips of denim-like fabric since I wanted to stick to one color. I used the same fabric for the back cover pocket. I made it that way so I could switch the front and back whenever I felt like it. For now, the cats are watching over my kitchen.
Here's a tutorial -
Here are the steps how I made the cover -
1. Create the front cover (follow the process here).
2. Make the main cover
- Cut 7 strips of 3" x 39"
- Sew the strips together
- Iron both sides
- Sandwich with wadding and back fabric (I used an old bed protector)
- Pin and quilt
- Clean up the sides
- Cut the base, same size as your front cover 10.5" x 14.5"
- Sandwich base with wadding
- Pin and quilt lines from top to bottom
- Cut 7 strips of 2" x 6.5"
- Combine and iron both sides
- Sandwich with wadding and quilt
- Add binding to the top of the pocket
- Attach the pocket to the base
4. Make binding (how-to here)
5. Assemble the three sides and combine with bias tape

Materials

scraps for the back cover pocket
8 strips of fabric for main cover (or use jelly roll)
fabric for binding/bias tape
wadding
back fabric for sandwich (optional if you re-use a bed protector)
thread
*see cat quilt post for materials needed for front cover
Size
Total: 10.5" x 14.5" x 14.5"
Main cover: 14.5" x 38"
Front cover: 10.5" x 14.5"
Back cover: 10.5" x 14.5"
Pocket: 10.5" x 6.5"
No comments:
Post a Comment