
I have a friend who loves Little Twin Stars. I knew about this Sanrio character because my sister had it on her dresser (jewelry boxes). I'm glad I found Little Twin Stars fabric online. I only got a meter because it's expensive! There's probably a lot more options available in Japan.
After storing the fabric for a few months, I finally decided to make a laptop sleeve for my friend. I asked her what kind of laptop she was using. Then I worked out the measurements and design. I asked help from my son to help me choose the colors of the fabric. I wanted to make sure the colors would complement the Little Twin Stars fabric.
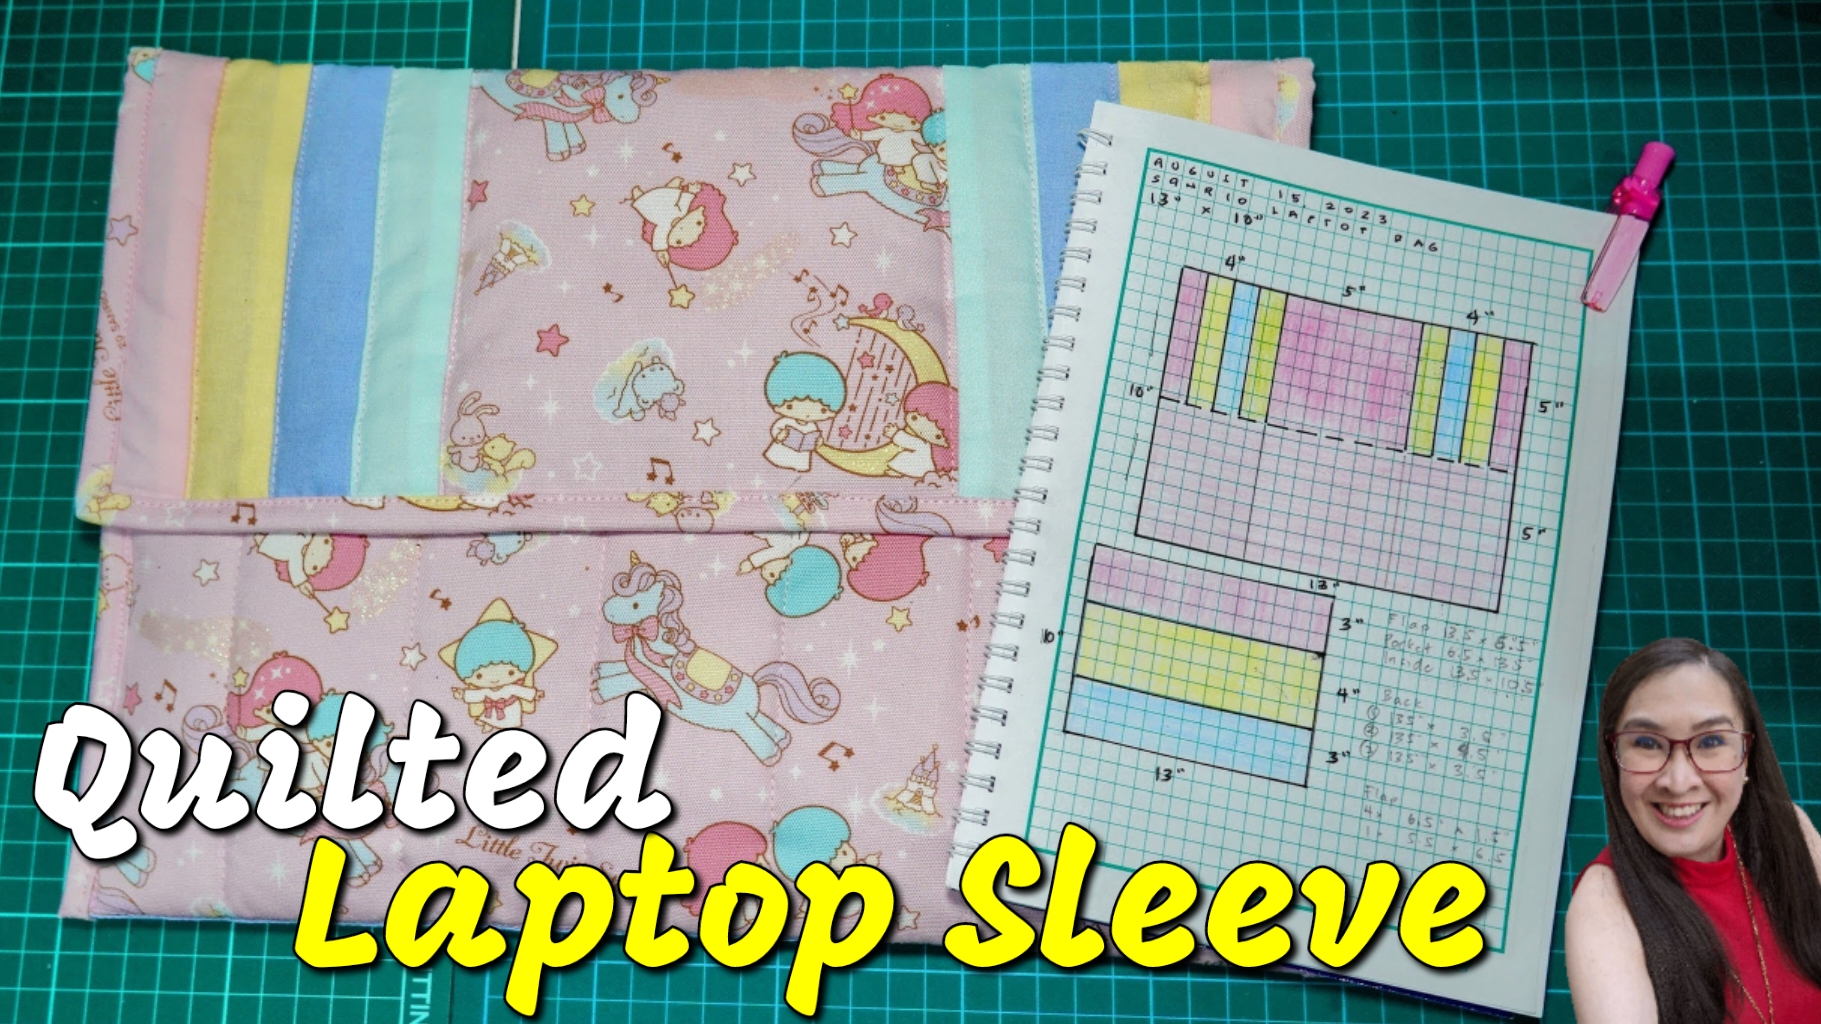
I made the design simple, to make sure the Little Twin Stars fabric is noticeable. The challenging part in assembling this quilted laptop sleeve is figuring out how to properly add the pocket. I wanted the wadding to be continuous to add strength to the sleeve.
I'm glad I didn't rush to finish the project because I was able to make the sleeve stable. I was also able to add velcro discreetly. I didn't want stitches for the velcro to show on the flap. I'm happy how it turned out, I just hope my friend's laptop fits!
Here's the tutorial:
The steps:

2. Create the inner panel and pocket. Sandwich the pocket with wadding and bind the top. Join the inner panel and pocket at the bottom.
3. Piece together the flap.
4. Piece together the back panel.
5. Join the back panel and flap. Then join the inner panel with pocket.
6. Sandwich with wadding. Stabilize with pins and then quilt. Don't quilt the flap yet.
7. Add velcro to the flap and pocket, then quilt.
8. Finish with binding.
Materials:

4 pastel solid color fabric
backing fabric
wadding
thread
velcro
Size:
13.5" x 10"
Pattern:


